
How to shoot the Northern Lights - Aurora Borealis - with your Olympus Camera
Composing Landscapes.
When I am searching for motives and elements to make a composition, I look for structures, leading lines and isolated subjects. When I find something interesting, I test the composition by taking shots in three different variations. When none of the compositions work to my satisfaction, I move to another location but I always return later to give the composition another try as a refreshed mindset and altered light can make a dramatic difference. This approach has served me well.
I like to find locations which are unspoiled and unexplored by the photographic community. This approach will allow you to return home with images which are unique. It takes more time to scout these locations of course, but it is definitely worth the effort and extremely rewarding.
It is vital to know your camera well, to know where the buttons and menu items are when you need them, especially when shooting the Northern Lights, as you need to be fast so as to not miss the perfect capture. Lady Aurora doesn’t stop her show because you are not ready. And when shooting the Northern Lights, you will need to make adjustments to the settings constantly and quickly.
For my landscapes, I always carry the M.Zuiko 7-14mm PRO, M.Zuiko 12-40mm PRO, M.Zuiko 75mm f.18 lens with me although, recently I have started to use the 40-150mm PRO more and more as this lens enables me to isolate subjects when the weather is dull (no meaningful sky) or when I want to get closer to the subject. My favorite lenses are the first two, although the image-rendering quality and sharpness of all of the M.Zuiko lenses is outstanding.
With my Olympus, I love the fact that you can freely reassign your key functionality to any button. I have assigned Magnification and Focus Peaking to the front buttons. I have set the AEL button to AF-ON (back button focus). These settings have proven to be very efficient when shooting the Aurora Borealis or Northern Lights. As focusing in the dark is difficult, with these settings you can quickly magnify the view of a bright star and with focus peaking enabled obtain pin sharp focus using the focus wheel on the lens (the camera needs to be in M-mode because once you find the focus you do not want to lose it (when you press the shutter and have AFS on the shutter). The beauty of the Olympus EM1 Mark II and EM5 Mark II is that when the camera is in MF mode (manual focus) you still can use the AF-ON (AEL button) to autofocus (Mode 3 in A1 AEL - Set MF setting in Mode 3), which is very helpful when focusing needs to quick. With the latest firmware update on the EM1 Mark II - v3.1 - I am now able to AF in the dark on literally every tiny little light source and the camera now can measure to -7.5 EV.
It is a misguided myth that the mFT sensor is not good at capturing low light images. Once you understand the effect of the signal to noise ratio, you will be able to capture stunning Northern Lights and Astro images with nearly no noise. It‘s all about getting a perfect balance of ISO and exposure. Suppose the exposure would be 3 sec at ISO 800. If you apply the “signal to noise ratio“ you should now expose this image with the same exposure time but at a higher ISO (Lets say 2 stops). When you look at your histogram you will notice that the shadows (The area where you normally will notice the most noise) are more exposed to the right. In post production you will reduce the exposure by 2 stops and you will see that the noise will decrease naturally as you darken the image. I found that, when shooting the Aurora Borealis, ISO 4000 and exposure times between 1 and 5 seconds (optimal) are ideal for the EM1 Mark II (up to 10 sec is possible but not preferable). Depending on the activity of the Aurora Borealis you may need to reduce or increase the ISO accordingly. With high activity (Strong Solar windspeed (G1+ Solar Magnetic Storms) you may need to go down to ISO 800 - 1250. It is important that the exposure does not go beyond 10 seconds as the Aurora will start to loose its structure.
Over the years I have done many tests on what White Balance to use when you want to shoot the Northern Lights. Many articles suggest that you should select the White Balance between 3400 - 3900K. Although I tend to agree to these temperatures, I have experienced that with the increase of sensor technology sensibility, these numbers (temperatures) are stretching. I have noticed that the Aurora’s got greener and greener and as we know the Aurora Borealis is not green, but coloured between yellowish green. After doing more study and shooting more Time-Lapses of the Northern Lights, one day I made the decision to shoot the Northern Lights using Auto White Balance. Many people would say this is insane, but I came to the conclusion that the Auto White Balance setting is the correct setting for Lady Aurora. Why? As the Aurora Borealis shows various colours - ranging from 60 variations of Green, Red, Yellow, Pink, Blue and White - we need to understand what is causing these colours. It is fairly simple to explain (although the process is extremely complex and I do not want to make too difficult to read), as the solar speed (wind), solar density and interplanetary magnetic field activity are changing constantly, the ionisation of the particles, when they collide with Oxygen O (causing Green / Yellow) and/or with the Nitrogen N (causing Red, Violet (Pink, Blue) the type of collision will effect the colours of the Aurora Borealis. The altitude on which this ionisation occurs is the other factor which will effect the colour of the Aurora Borealis.
When you shoot a time-lapse over a longer time you will notice the change of colours of the Aurora more dramatically than in a single image. Since this day I always shoot my Aurora Borealis images on AWB and will make minimal adjustments in post when necessary.
So how should you shoot the Northern Lights / Aurora Borealis with your Olympus camera? The settings are a bit dependent on which model you shoot with. As the EM5 Mark II has a 16MP sensor and the latest EM1 Mark II a 20MP sensor the images will be effected accordingly. When you apply the tips & tricks below you also will be able to shoot very fine images of the Northern Lights with your EM5 Mark II as well. This applies as well for the Olympus Pen F. The Olympus EM1 Mark II will take your imagery a step forward. So let’s see what settings we need to make to the camera in order to make some home bringing images.
Basic Settings:
Set camera on AWB (Auto White Balance)
Disable IBIS (Image Stabilisation) - Very IMPORTANT!
Select the orientation your want to shoot in (Landscape or Portrait format)
Mount your camera on a tripod
Set the camera in M mode (dial wheel on the top of the camera)
Set the camera - using SCP (Super Control Panel (press OK Button) - in MF (Manual Focus) mode
Make sure you have assigned the AEL Button to AF/ON (Back Button Focus) (See above which Menu Item) - You will appreciate this new way of working….
Set the ISO to 4000 to start with
ISO is dependent on the solar activity
High - G1/G2 storm - ISO 800 - ISO 1250
Medium - ISO 1250 - ISO 2500
Low - ISO 2500 - ISO 4000 / 5000
Very Low - experiment with 6400
Set the shutter speed on 3.2, 4 or 5 seconds
We have learned that we do not want to have longer shutter speeds than approx. 5 seconds.
Shutter Speed you will use is dependent on Solar Activity
High - G1/G2 Storm - Shutter 1 - 2 seconds
Medium - 2 - 4 seconds
Low - 4 - 5 seconds
Very low - max 10 seconds.
Make sure you have Live Boost enabled
Set Picture Profile to „muted“
Make sure you can operate your EM1 Mark II / EM5 Mark II in the dark, without using a headlight. Practice, practice… When you can operate your camera in the dark, it will help you to be faster and achieve better results (and you will not annoy other photographers with that head-light)
When you use a headlight then you should use one which you can set to red
Take into consideration that your eyes need to adjust about 30 min after you uses white light to set up your camera
Dim the light of your camera display (Menu E2 - Bulb /Time Monitor) to -7
Disable all Noise Reduction settings in the camera
Be patient
Which lenses to use?
M.Zuiko 7-14mm f2.8 PRO lens
M.Zuiko 8mm f1.8 PRO lens
M.Zuiko 12-40mm f2.8 PRO lens
M.Zuiko 12mm f2.0 lens
M.Zuiko 17mm f1.8 lens
M.Zuiko 17mm f1.2 lens
LAOWA 7.5mm f2.0 (Manual lens)
Leica 12mm f1.4
Leica 12mm f2.8 - 4.0 (only shoot with the lowest focal length)
Leica 8 - 18mm f2.8 - 4.0 (only shoot with the lowest focal length)
All these lenses will give you excellent results shooting the Aurora Borealis. I also have listed both 17mm M.Zuiko lenses, as both lenses are still wide enough to capture good quality images of the Aurora and they are fast! The wider the better, but if you have no wide angle lens (like the M.Zuiko 7-14mm PRO), don’t worry the 12mm or 17mm lenses are more than suitable. The faster the lens (lower aperture) the better, as you will be able to capture more light on the sensor. So an f2.0 lens is in terms of light better than a f2.8 lens. You will gain 1 stop of more light. See it this way…shoot at ISO 6400 with an f2.8 lens you can shoot at ISO 3200 with an f2.0 lens. Although I use both M.Zuiko 7-14mm PRO f2.8 and M.Zuiko 12mm f2.0 lenses, the majority of images you see in this article are taken with the 7-14mm PRO lens. Why? I want to show that it is not really necessary to have a fast lens and will be able to capture stunning Aurora images with an f2.8 lens. It is of course beneficial to have a faster and I hope that Olympus will release an 11 or 12mm f1.2 lens due course. This fast lens will be high on my wishlist as it will open new doors!
Today the Olympus M.Zuiko 12mm f2.0 is my favorite lens as it marvels when shooting the Aurora Borealis. As we can capture more light (1 stop), we should not decrease the shutter-speed too much as we want to achieve a good balanced histogram.
What it important:
Make sure that you have pin sharp focus. - How the achieve this?
Back Button AF focus
Point on a light source far away
Press the AEL button to AF
Wait until the Focus Point lits up green
Now you have AF
Focus Peaking - enabled
Magnification (10x / 14x) - enabled
Select a bright star
Check the display
DON’T touch the lens clutch if you have achieved AF with the Back Button Focus
When you have not achieved AF focus.
Enable Focus Peaking
Enable Magnification (10x / 14x)
Focus on a bright star
Set Manual focus with the lens (push the clutch back)
Look at your display pay attention on the size of the stars!
Don’t trust the „infinity sign“ on the lens….this is not a measure to get sharp images.
When the star looks like a circle, you have focus
Disable Focus Peaking
Check the star (the contrast detection should be gone now)
Enable Focus Peaking
Check the star (the contrast detection should be back now)
Take an image
Use a remote shutter to take the image
Check the Image by pressing the Preview Button
Magnify the image
Scroll to a star
The star should be a circle
Pay attention to your composition and adjust accordingly
Check the histogram and see how it looks likes.
Take another image and check the above again. Once you are fine with your result, start take a few images of the Northern Lights.
Tripod
It is obvious and probably needless to say, but you need a good sturdy tripod.
Most tripods will work fine when shooting the Northern Lights.
Ballhead
Very important is the usage of a good ball-head. Not every ball head is flexible enough in order to react fast on the movement of the Northern Lights.
Ball-heads like Arca Swiss D4 is a perfect ball-head for shooting landscapes, but for the Northern Lights it is not suitable enough.
Ball-heads like Arca Swiss P0, Uniqball, Sirui, 3Leggedthing, RRS, etc. work very fine.
Safety FIRST and some other advice
Don’t take risks to make the shot of the century…It is not worth it. When you can not make the shot, watch the Aurora and enjoy her show
Be diligent and precise in the way you photograph
Watch you where you put your equipment
Wear spikes under your shoes when it is slippery. It saves a lot!
This article is brought to you by Hendrik Anne Zwart of Nordic Light Photo Tours. If you have a comment, please leave them in the comments section below. When you are chasing the Northern Lights….be safe and remember - sometimes it is better to watch the Aurora then making images…Enjoy.

Olympus EM1 Mark II - M.Zuiko 12mm f2.0 - ISO 1250 - 3,7 sec

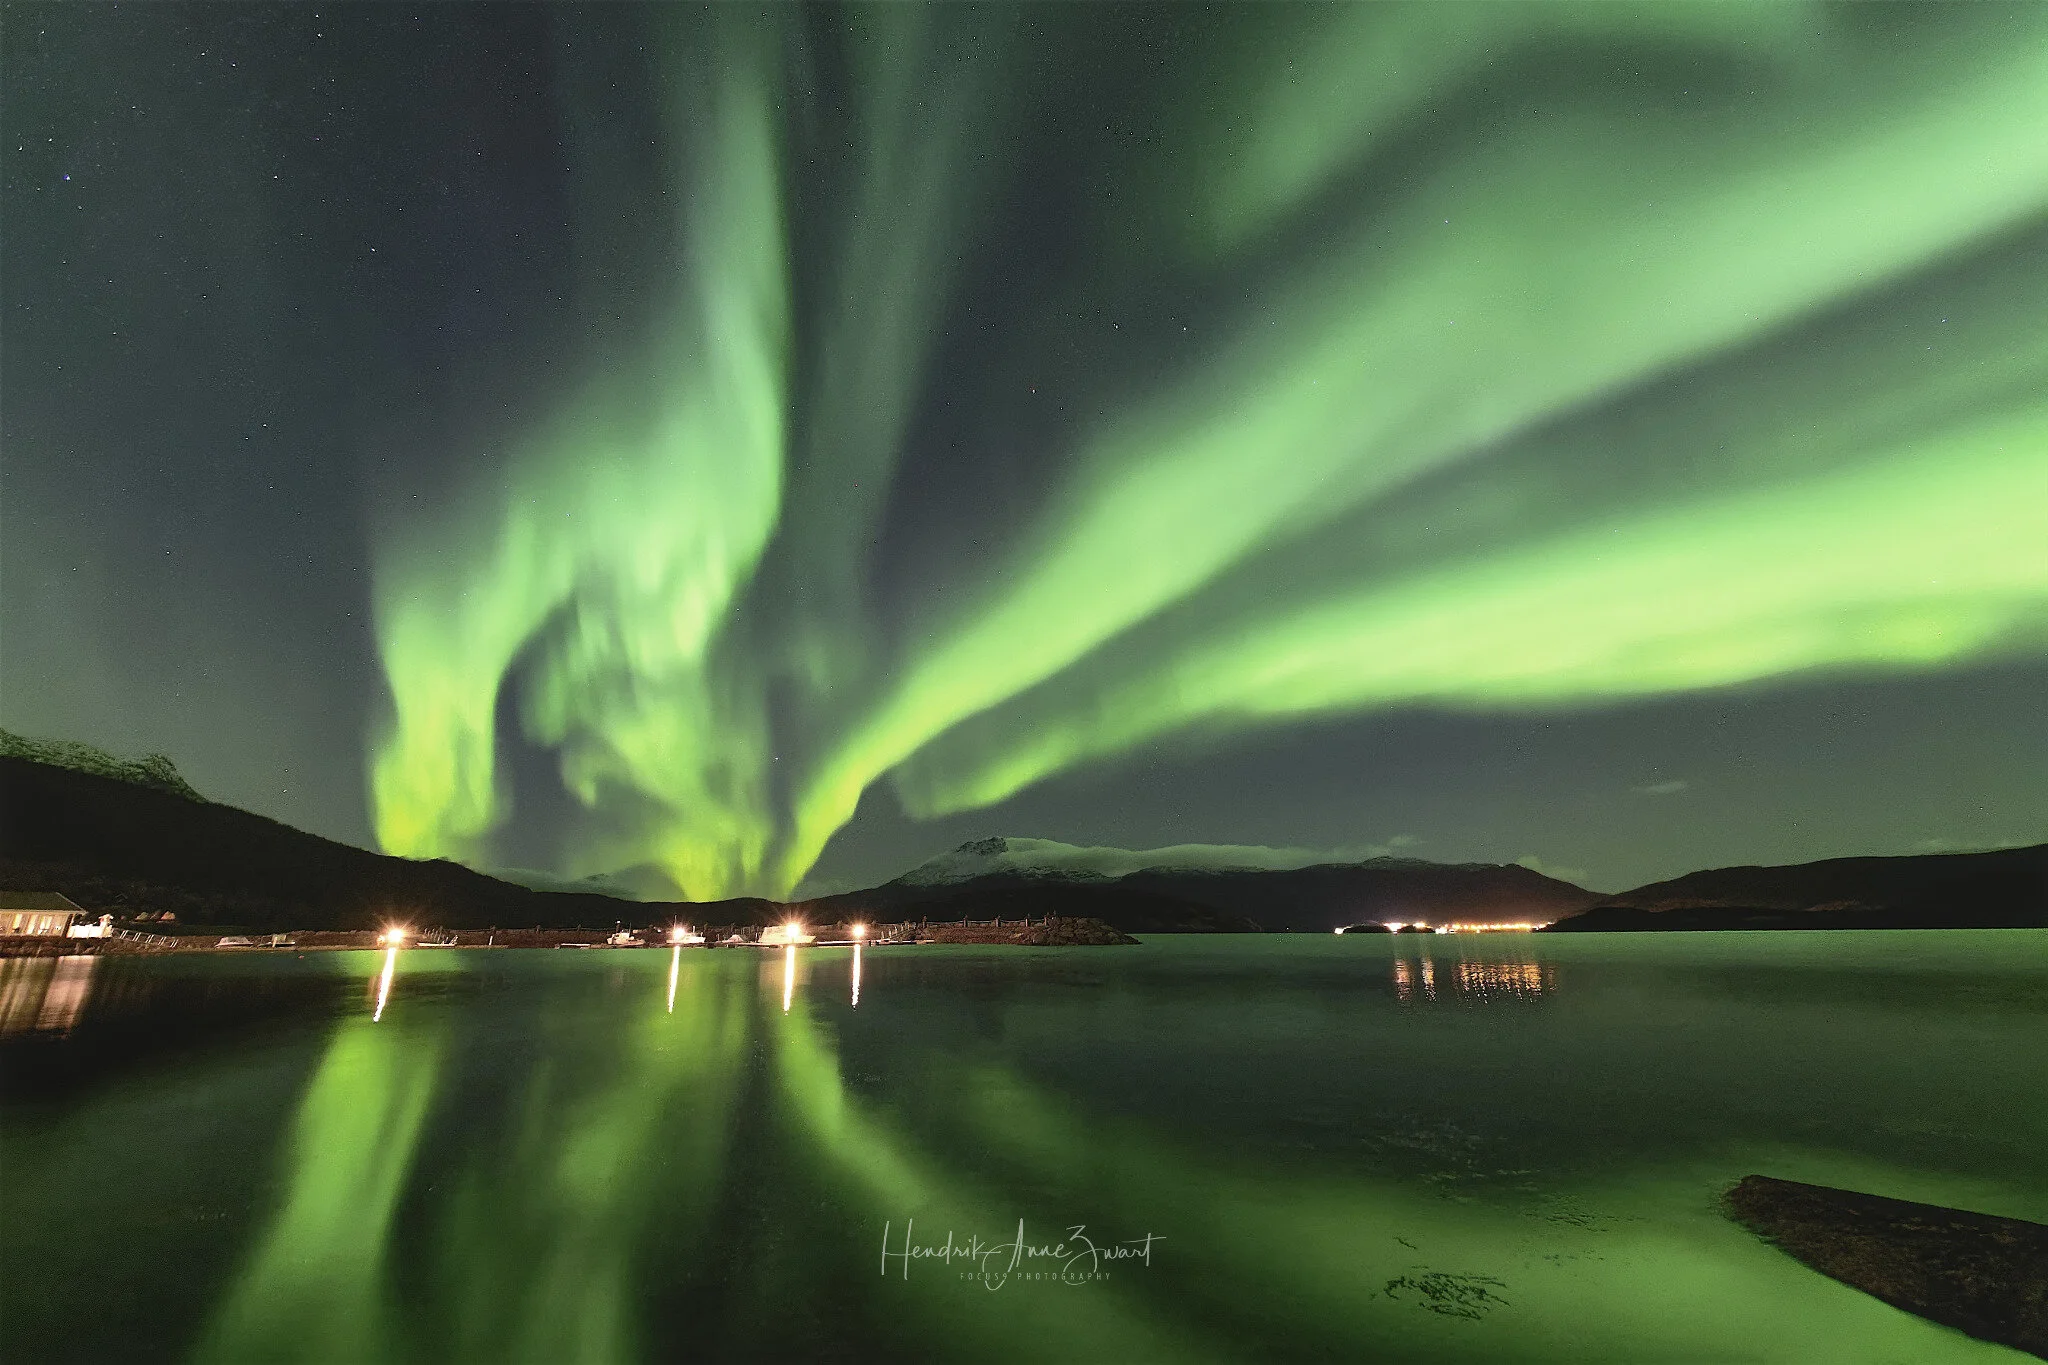
Olympus EM1 Mark II - M.Zuiko 7-14mm PRO - ISO 4000 - 3,2 sec

Olympus EM1 Mark II - M.Zuiko 12mm f2.0 - ISO 1250 - 4.3 sec

Olympus EM5 Mark II - M.Zuiko 7-14mm PRO - ISO 1600 - 5,2 sec

Olympus EM1 Mark II - M.Zuiko 12mm f2.0 - ISO 1250 - 6.5 sec

Olympus EM1 Mark II - M.Zuiko 8mm f1.8 PRO - ISO 1250 - 3.2 sec

Olympus EM1 Mark II - M-Zuiko 7-14mm PRO - ISO 1600 - Live Composite - 20s

Oympus EM1 Mark II - M.Zuiko 7-14mm PRO - f2.8 - ISO 4000 - 5 sec

Olympus EM1 Mark II - M.Zuiko 7-14mm PRO - f2.8 - ISO 4000 - 3.2 sec

Olympus EM1 Mark II - M.Zuiko 7-14mm PRO - f2.8 - ISO 1600 - 4,5 sec

Olympus EM1 Mark II - M.Zuiko 7-14mm PRO - f2.8 - ISO 4000 - 3,2 sec
Olympus EM1 Mark II - M-Zuiko 7-14mm PRO f2.8 - ISO 4000 - 4 sec

Olympus EM1 Mark II - M.Zuiko 7-14mm PRO f2.8 - ISO 4000 - 3,2 sec - Panorama of 4 images